 Here are a few pics of us at the Circle meetup in Greenville this past weekend. A fun time was had by all!! Cant wait to see you all again!


 Here are a few pics of us at the Circle meetup in Greenville this past weekend. A fun time was had by all!! Cant wait to see you all again!
 I really had a great time recently joining some stick pin swaps. One was a teacup pin cushion swap and one was a stick pin swap. I found this "teacup" at TJ Maxx. It originally was a paperclip holder I believe and thought it was Perfect!! I used some Christmas rubons for the ornaments on the cup and also added a metal tag to the front. I created the cushion from plain red fabric and batting and a styrofoam ball and glued it into the cup. Made the pins using 3 in flower pins and beads. SOme from Oriental trading and some I got from a bead sale at Michaels.
 This is the one I made for the stick pin swap and didnt require a tea cup. I made a noteholder for the pins for this one. I ran foam through my zyron and cut to size and layered to hold the pins. I wrapped ribbon around the foam to cover the edges of the foam and glued in the note holder and used red ribbon to hold it closed.
 Closed view of stick pin holder
 This is a picture of the pin cushion I received back in my swap. I havent yet received the other swap back but will post that once I do (should be next week) I sent mine early as I had to mail a bunch of things so thought that would be ok.
 Stick pins are soooo easy to make and alot of fun. I will definately be going more of these to add to some of my Christmas cards this year!!


 These projects were made for the papercraft weekend challenge blog. Technique Tuesday was all about heat embossing. I made 3 projects.
 Well...this is the first Christmas card of the season. I made this for a glitter challenge on the Paper craft weekend challenge blog and let me just say I am so dissapointed in how it turned out. But thats ok. I have lots of time to make more and get them right. lol The challenge was to use glitter on a project.
 I have finally gotten back into my craftroom after a couple months of not crafting. I made these for the Paper craft weekend challenge. If your not familar with it please stop by! This has been on facebook for a couple of months now and this weekend they have launched their new blog! They have a new challenge every Friday and Sunday and will be throwing in some other challenges and tutorials through the week.

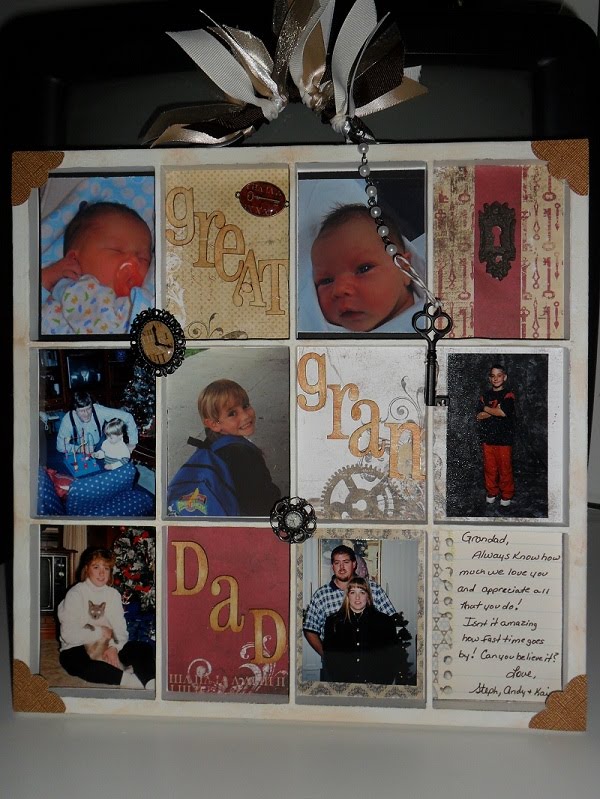
 I made this for my parents, they are new to camping and I want to make them a guide book or to do list for the things they need to do when they go camping so they dont forget anything. I decided to make them a mini album using my Your Story binder and the Campin Critters cart. The inside pages are layered with white, brown and white again so that they can write on the front or the back and each page will be sturdy. They can make lists or add pics.
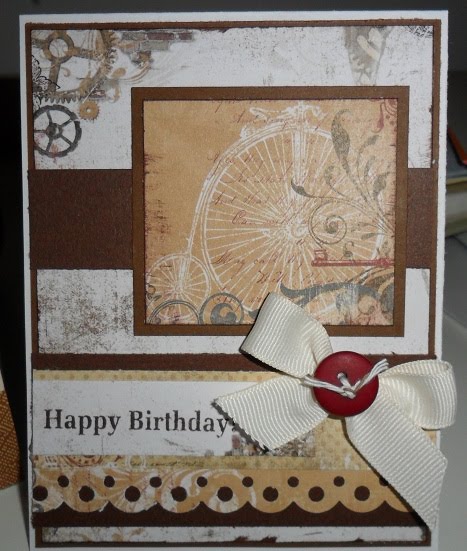

 I actually made this card back in Sept when I got my Imagine but never posted it. I love how easy it is making items when using the Imagine. Having the ability to match everything effortlessly is such a time saver!


 I completed my entry for the Monthly challenge on the circle blog. This challenge was all about Banners. I used the Inspriation banner sentiment BE MINE for my banner and used my Imagine for most of it. I printed the pink paper for the pennents from Lori's Garden and also the medalion was printed from Lori's garden. The letters were cut from the Country Life cart on my Imagine. I made rosettes using tissue paper that surprisingly was a perfect match to the colors from the Loris Garden cart. This was the biggest challenge as I had never made rosettes before and didnt know what I was doing at all. I think I could have done better with a little more practice but they did turn out better than I had expected! I lightly glittered around the rosettes and used my pearl viva pen to make little pearls on the letters. I cuttlebug'd the pennents and sanded then to distress them a little and that really made them pop. The pictures are not doing this any justice it is really pretty and soft in person but I cant take a picture to save my life.


 I have been fairly busy crafting this weekend and this is one of the cards I completed. It is a just because card and I was insired by a card I saw in this months Cardmaker Mag. I thought it was so pretty I had to give it a shot. I made this with scraps from a banner project I am working on for the Circut Circle monthly Challenge. I printed the pink paper with my Imagine from the Loris Garden cart and also printed the pattern paper from one of the patterns on this cart. I stamped the tree (from Imaginisce) and used Sweet pea flower soft on the branches and leaves. The sentiment is from the Ultimate Sentiments line from The Scrapmaster.


